Showing posts with label Comfort Food. Show all posts

Thursday, November 6, 2014

Thanksgiving Goodie Ideas ~ We All Need Them

Before I know it, Thanksgiving is going to be crashing through my door wanting to know where to land.  This is my way of being prepared and having plenty to occupy my kiddles as the holiday approaches.


In my search for all things Thanksgiving, I have come across some great blog sites.  Because I'm so nice, and I know that there are other mommies out there looking for activities and recipes too, I'm going to share them with you.  

Thursday, January 10, 2013

Fruit & Nutty Cream Of Wheat

When the weather is chilly or just down right cold, I tend to head straight for a box of Cream of Wheat. 

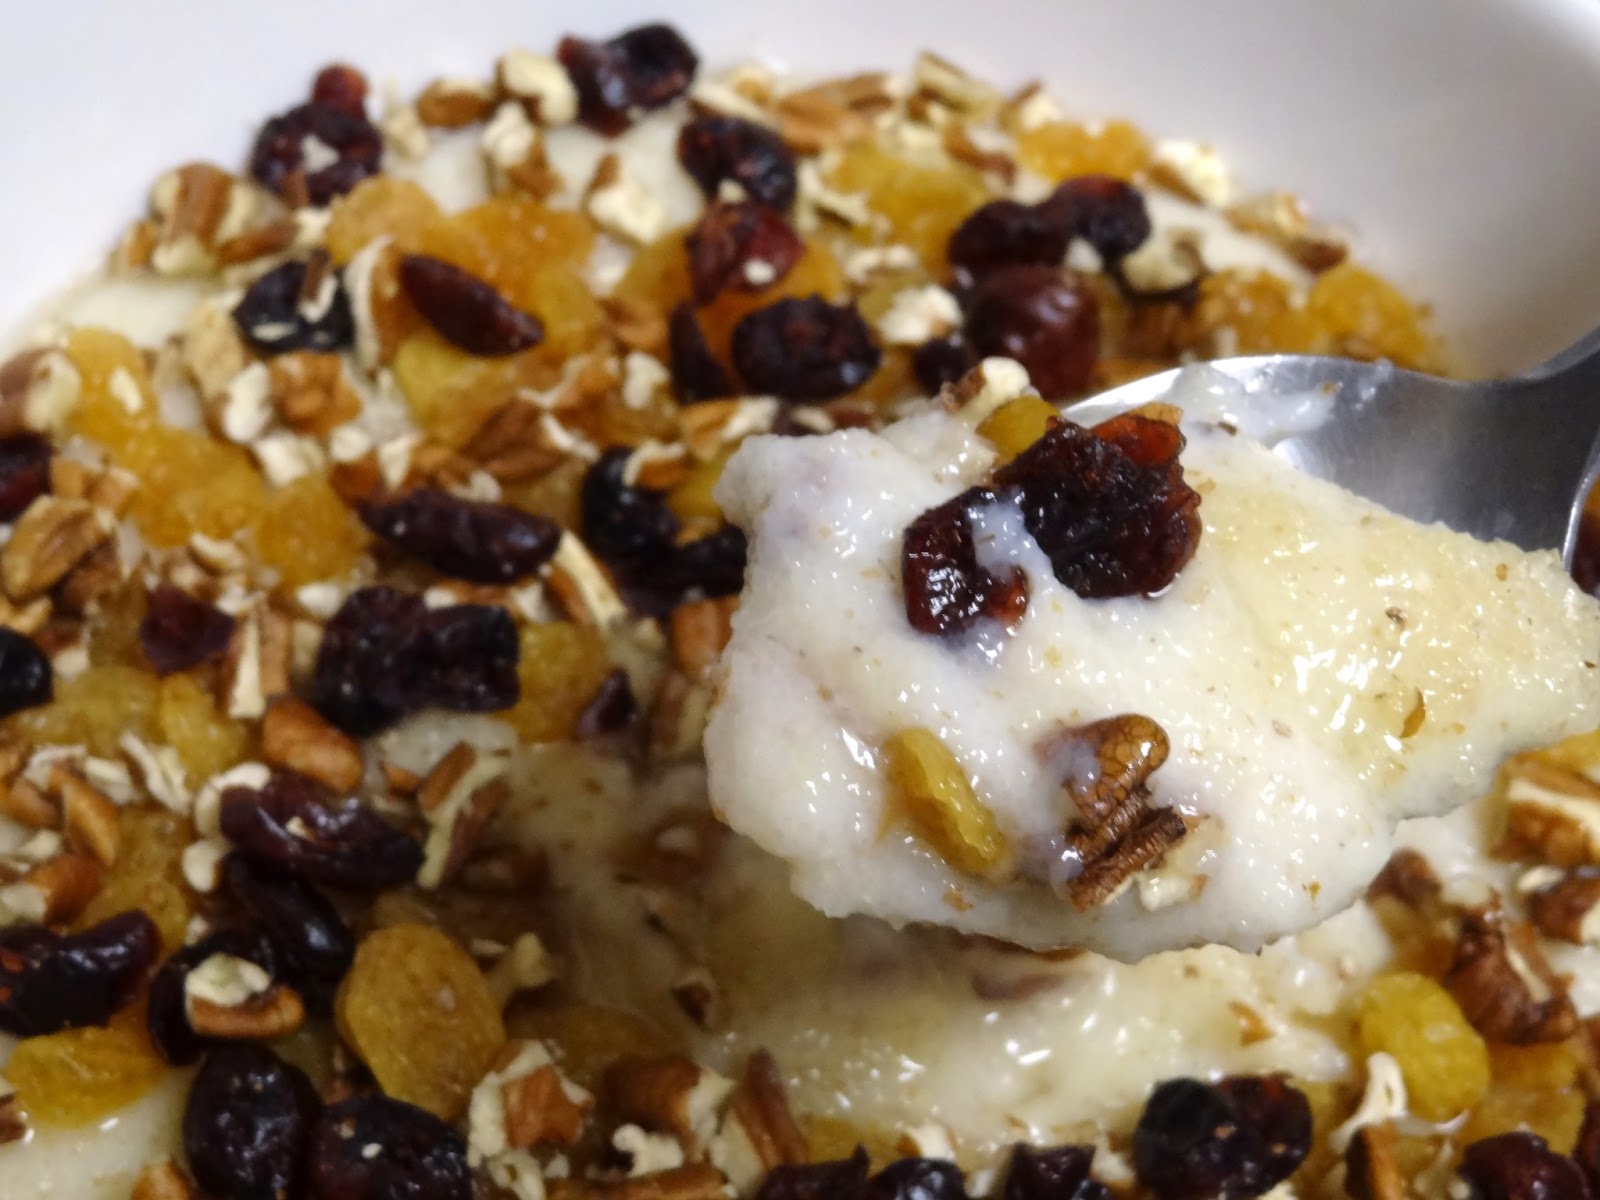
Now, I love it just on it's own, but some mornings I feel the need to play a little bit of dress-up with it.  Dried fruit & nuts are an instant hit and give you a bit more to help you get through the morning.


First I heat the milk (or you could use water) In a small saucepan until it comes to a low boil. Once it starts to boil, I turn the heat down to low. Add a little salt. Then add in the Cream of Wheat and stir with a whisk until it thickens.

You've got to watch it though, Cream of Wheat tends to thicken up in an instant and can easily scald on the bottom of the pan.

As soon as it's done, pour the comfort cereal into a bowl.  If the cereal has become thicker than you like, simply at a tablespoon or two of milk and stir until you get the desired thickness. 


Then  top with dried fruit. (I like cranberries and golden raisins)


And then some pecan pieces. And if you need some more sweetness, add a little bit of raw sugar to taste.

Why raw sugar?  I don't know, it just seems to go well with warm cereals. You could also add a dash of cinnamon if you're feeling it. (I highly recommend it)


Isn't that a pretty bowl of comfort?

 
Then stir it all around. Mmmm


When I want to be really bad I toss in a few dark chocolate or semi-sweet chocolate chips. *Hee hee*

Thursday, April 26, 2012

Chicken Stroganoff with Bow Tie Pasta


This dinner is such a great comfort food and so easy to prepare. A chicken twist to the traditional beef stroganoff!


Start by slicing breasts in 1/4" thick slices and halve the longer pieces.


Over medium heat, preheat a large skillet with 1 tablespoon canola oil.  Once the oil begins to ripple, add chicken and onions/onion powder.


Allow the chicken to sizzle & simmer until fully cooked, stirring often.  You don't want to see any pink in that chicken!


While the chicken is cooking, in a large pot bring water to a boil.  Once the water is boiling, add some salt.  This is the time that you get to add flavor to the pasta/noodles.  Then the pasta needs to hop in!  Give it a stir so that nothing sticks together and occasionally come back for another stir while it cooks.  Cook according to the package directions...I prefer to have it FIRM for this dish.


While pasta is cooking, in a medium bowl combine cream of mushroom soup, sour cream and milk.


Once chicken is fully cooked and pieces are no longer pink, add mixture. Stir in garlic salt and allow to simmer 5-8 minutes.


Simmer, simmer, simmer...


Then spoon over drained pasta & ENJOY!  (Optional: Top with black pepper to taste)


Chicken Stroganoff with Bow Tie Pasta

Prep Time: 20 Minutes
Cook Time: 20 Minutes
Servings: 6-8
Level: Easy

Ingredients:
4 skinless, boneless chicken breast halves
1/2 cup chopped onion OR 1/2 tsp. onion powder
2 - 10 3/4 ounce can condensed cream of mushroom soup (or 1 family size can)
1/2 cup milk
1 package dried bow tie pasta (or wide egg noodles, traditional)
8 tablespoons dairy sour cream (or 8 oz. container)
1/2 teaspoon garlic salt (or 1/4 teaspoon garlic powder and 1/2 teaspoon salt)
Freshly ground black pepper (optional)


Instructions:
Slice chicken breasts into 1/4" wide strips. (along the width of chicken breast, not length).  Preheat a large skillet with 1 tablespoon canola oil over medium heat. Add chicken and onions/onion powder. Allow to simmer until fully cooked, stirring often.

In a large pot add 6 cups water and bring to a boil over high heat.  Once boiling, add salt (to flavor pasta) and pour in pasta. Cook according to package directions. Drain.

While pasta is cooking, in a medium bowl combine cream of mushroom soup, sour cream and milk. Once chicken is fully cooked and pieces are no longer pink, add mixture.  Stir in garlic salt and allow to simmer 5-8 minutes.

Spoon stroganoff mixture over pasta to serve. Add black pepper to taste.

Tuesday, June 22, 2010

Easy Cheesy Stuffed Shells


One of the things that I had yet to attempt in the kitchen was stuffed pasta shells. So, I decided to turn to Food Network's Giada de Laurentiis for a recipe idea. Let's just say that she's my Italian Go-To-Gal.
I modified her recipe ever so slightly, I mean I had to. Couple this dish with some garlic bread and MmmmmMmmmmMmmmmm! Here's my take on Giada de Laurentiis' Stuffed Shells with Arrabbiata Sauce.

Click below to view & print my recipe!
View complete posting: Easy Cheesy Stuffed Shells

Friday, June 4, 2010

National Doughnut Day! 06/04/10

Oh yes...one of the sweetest days of the year is here! And what better day than on a Friday?!
Krispy Kreme and Dunkin Donuts are giving away free doughnuts...Hooray!

View complete posting: National Doughnut Day! 06/04/10

Stuffed Burger ~ Gorgonzola Style!


Just because I'm on a diet doesn't mean that I can't enjoy a great burger from time to time.

So here's one of our favorite burgers...I just eliminate the bun to reduce my carbs and calorie count. And I'm telling ya, you don't need a bun with this burger. It's full of great flavor...don't mask it with a bun. (but if you must, choose a whole wheat bun)

I start with 85/15 ground chuck meat. 1 pound of meat will make two very meaty hamburgers.

View complete posting: Stuffed Burger ~ Gorgonzola Style!

Wednesday, April 14, 2010

Cheesy Pub Beer Bread


Just look at this golden loaf of comfort!
 
Oh, just the smell of this bread in the oven immediately takes me back to when my mother used to make it when I was little. It seemed like she made it all the time when I was in grade school...I don't know what happened after that. Somehow it just disappeared from our menu altogether.

Well, it’s BACK! And back to stay! This is truly the easiest recipe in the world to make a scrumptious loaf of bread. In fact, you’ll find that you have to hold yourself back from making it all the time.

Would I call it a comfort food? Oh yeah, you better believe it! So enough chatter…let’s get to baking! (And we only need 6 ingredients to get the job done!)
 
 
Start with some all-purpose flour. Nothing fancy here…the simpler the better.
 

Add baking powder. Then give it a little stir with a fork just to mix it around.

 
Next add some sea salt. Stir that in with a fork.


A little bit of sugar…bread needs just a touch of sweetness. Again, stir it in with the fork to get it all incorporated.
 
 
Now for the best part. Here’s the beauty of this…you can use a cheap beer or a pricey port. It’s up to you. 
 
To be honest, the darker beers tend to give the best flavor…at least that’s what Charming says. (He really liked this Michelob Amber Bock) But no matter what you choose, you’re still going to love it. (This happens to be my preferred method of enjoying a beer.) 

 
Pour in that yeasty goodness…it’s not only our flavoring agent, it’s the secret to not needing yeast or self rising flour!

 
Give everything a good stir…I just use my fork, but a spoon is fine too. And don’t worry, it’s supposed to be lumpy & bumpy.

 
Now you can skip this step if you are trying to stay away from dairy, or just trying to cut some calories….


I take some shredded colby jack cheese (1 cup) and add it to the dough. Mild or sharp cheddar cheese is really good too!
 
 
Grab a loaf pan and grease it with 1 Tbsp. of the butter.
 
 
Form the dough into a rough ball.
 
 
Plop our cheesy beer dough into the pan and form a loaf.
 
 
Then into the oven for 45 minutes. And trust me…you’re going to wish that you had made two loaves when the aroma starts wafting through the air.

 
When the timer goes off, remove the bread from the oven but don’t turn it off! Cube and melt the remaining butter. (I melt it in a microwave safe measuring cup for about 30 seconds)

 
Then carefully pour all of that melted butter over the top of the bread.
 
 
Resist temptation and return the glistening, buttery bread to the oven for another 10-12 minutes. We want that butter to get the top of the bread all crusty and golden brown.


The timer sounds! The bread is removed from the oven! There should be a slight springiness when it’s pressed. A knife makes its way through the loaf…a little bit of butter is slathered onto the bread….and instant gratification!
 

So perfect alone for a little snack. (A great pairing with roasts, corned beef or Norwegian Meatballs)
Enjoy, Enjoy, ENJOY!

Cheesy Pub Beer Bread
Prep Time: 6 minutes
Cook Time: 55 minutes
Servings: 8
 
Ingredients:
3 cups Flour, All-Purpose
4 tsp. Baking Powder
1 1/2 tsp. Sea Salt
2 Tbsp. Sugar
12 oz. Beer, dark or light
1 cup Colby Jack or Cheddar Cheese, shredded
5 Tbsp. Butter, divided

Directions:
Preheat oven to 350°F. Grease a loaf pan with 1 Tbsp. of the butter. Set aside.

In a medium mixing bowl add flour, baking powder, sea salt and sugar. Stir to fully incorporate ingredients.

Pour beer into dry ingredient mixture. Stir just enough to incorporate through the dry ingredients. Dough should be lumpy.

Add cheese to dough. Mix with hands just until cheese is dispersed through the dough.

Form into a ball. Take prepared loaf pan and place dough inside. Lightly press dough to form a loaf.

Bake loaf in preheated oven for 45 minutes for first bake.

Melt remaining butter in a microwave safe bowl or cup for 25-30 seconds on high.

Remove loaf from oven and carefully pour melted butter over entire loaf.

Return loaf to oven for 10-12 minutes. Crust should be golden brown and loaf should have a slight give when fully baked.

Place on cooling rack for 5-10 minutes before serving. ENJOY!

Monday, April 5, 2010

Nutty Spiced Cranberry & Golden Raisin Oatmeal


I have always been a fan of oatmeal...then I discovered Steel Cut Oatmeal. Oh, that only made me love oatmeal even more! If you have never tried it before, there is a distinct difference...a wonderful kind of nuttiness that comes from the steel cut oats.

View complete posting: Nutty Spiced Cranberry & Golden Raisin Oatmeal

Friday, February 5, 2010

Prosciutto Dogs


Hot dogs are great and all, but I really like mine dressed-up a bit. And Charming is always a happy man when I bring a plate of these dogs out to the table. There’s just something about meat that’s wrapped with meat…it makes men happy. While these are dressed with provolone cheese and crisped bacon, you can top the dogs with whatever you like.

So, super easy...Just for garnishing, I take 4 slices of bacon, halve them and get to sizzling in a skillet. If I don't want any bacon for garnish one night, then I just pour 2 tablespoons of extra virgin olive oil into the skillet.


While the bacon is sizzling, I start with some really good beef franks. (My family prefers Hebrew National's Beef Franks)


Then I carefully separate slices of prosciutto so that I have equal amounts of slices to hot dogs. You need one slice of prosciutto per frank...unless you get some of the thicker or longer franks, then two slices of prosciutto will be needed.


Prosciutto meets frank...I lay the prosciutto down and begin rolling the frank on a slight angle.


Continue rolling until the entire frank is wrapped in our lovely prosciutto. Then grab another and begin rolling again.


Remove the bacon and set it aside until later. Remove some of the rendered bacon fat allowing just enough to coat the bottom of the pan.


Time to get those franks into the skillet. (I'm getting hungry)


Allow the prosciutto to crisp-up on each side...it takes only about 2-3 minutes per side. 


Keep rolling the franks onto the uncooked sides until all sides are beautifully crispy & slightly browned. Don't these just make you want to grab one right out of the skillet and take a big bite? 
 

Oh yeah....time to deal with our buns. Regular buns are fine, usually I would recommend that whole wheat buns be used...

 
but this time I'm going with some cheesy breadsticks from the bakery. I cut each breadsticks in half and then split it down the middle.


Perfect for holding our prosciutto franks! It just needs a little bit of something...like a slice of provolone cheese!
 
Place our very hot dog onto the cheese and then dress it with some mustard.
 
 
Remember that bacon I did in the beginning? Well with a quick chop job, bacon bits are ready to be the ultimate topping for this hot dog.
 
  
Now that's a dog that deserves to be admired...then devoured quickly!