Showing posts with label Bacon. Show all posts

Tuesday, November 20, 2012

Bacon Wraps ~ Garlic Herb

These are great for little get-togethers or for watching the game. (but if there are a few fans during the game night, you'd better be ready with A LOT of these bad boys...this recipe makes approx. 16 wraps)

I took my Auntie Laila's recipe for Crispy Pineapple Cream Cheese Bacon Wraps and decided to make another filling for them. Since I love using garlic, this was the perfect opportunity to once again work it into a recipe...and with bacon! It literally took me 15 minutes to make the filling and wraps. Then there is a little care put into the baking portion, which is between 25-30 minutes on a low broil. But aside from that, this really is an extremely easy appetizer to turn out...and everyone loves them!

I start by taking a brick of cream cheese and slicing it right down the middle...at the 4 ounce marker. This allows me to also have one ready to make the pineapple wraps aswell. (saving any amount time is golden to me)
Then I take 2 garlic cloves, really only 1 is needed, but since I love garlic (and it's really good for the heart) I go with 2 cloves, and put them in my trusty garlic press.

Mincing garlic just is not my favorite thing...kinda like chopping onions. If I have to I will, but if the press is handy then there we go!

Mash it up a bit just to get those garlic juices going in the cheese.

Next I add in the onion salt...since it brings another bit of flavor to the table instead of just plain sea salt.
 
Now for the herbs in the "garlic herb" part of the cheese. A little bit of dried oregano...

dried parsley flakes...

and some black pepper jumps into the mix.
 
Time for the mashing to commence! A food processor could be used, but since mine is admittedly in storage right now, a simple table fork works just fine. (added bonus is that it is so much easier to clean than the food processor when cream cheese is part of the party)

Okay, now it's time to remove the crust from our plain old white bread. You know, the kind that sticks to the roof of your mouth when you take a bite. Thank goodness that does not happen here! Make one large crustless square out of each slice of bread.


Then I spread our garlic-herb cheese onto it in a decent layer...not too thick or all of it will just ooze out of the wrap during the cooking process.

Now cut each slice in half again. I finish off the other slices the same way and then it's time to turn my attention elsewhere. Time to address our bacon! Out of simple habit I have maple bacon...but really any type of bacon will do just fine.

Take each strip of bacon and cut it in half.

Then I roll the bread, or fold it in half, and wrap it with the bacon.

One little toothpick is all that is needed to secure everything in place.

Then onto the cookie sheet. Putting foil down will insure an easy release for turning the pieces as they cook.

Into the oven everyone goes, on the 2nd rack line on a low broil, for 2-3 10-minute intervals. Check after the first 10 minutes and turn each piece onto it's side. Allow it to bake another 7-8, check to see that nothing is burning...if they need another 2-3 minutes to brown up on that side, then let it happen. One more turn on the the opposite side to make sure that everything is nice and crispy. (I hate bacon that has any slight signs of not being done)

Then out of the oven, onto a plate for about 2 minutes...and into a very happy & salivating mouth.

Wednesday, February 17, 2010

Chicken Salad Club & Baby Spinach Sandwich


One of Charming's go-to lunches is a chicken salad sandwich...which is comforting and great on its own, but I just wanted to dress it up a little bit for him one day. So I decided that adding a little bit of bacon always dresses up a sammy pretty well...

View complete posting: Chicken Salad Club & Baby Spinach Sandwich

Breakfast Melts

I’m not a big eggs & bacon kinda gal for breakfast, but every once in a while it sounds good to start the day with some E&B. My two little darlings like to change-up breakfast from time to time too. So I thought that I’d share my quick breakfast melts as a good morning option. It’s cheaper than going to a burger joint and faster than waiting in line…so why not?

View complete posting: Breakfast Melts

Monday, January 11, 2010

Quick Bacon & Cheese Fritters


Beautiful little fried biscuits full of cheese & bacon goodness...Perfect as a side to a Pulled Pork Sandwich or any barbecue meal. These fritters have great flavor throughout and a wonderful crunch.
 
These little beauties are quick and simple to make. I take advantage of pre-made biscuit dough, (thank you Pillsbury!), and roll them through our short list of ingredients.
 
So I start off with 4 strips of bacon and cut them in half. (they fit in the pan better that way & it's easier to keep them straight) Set my heat to medium high and then into the skillet they go. I give them several minutes on one side, then flip them over and allow the other side to crisp.
 
Pull them out before they get too done...we like our bacon crunchy but not black as charcoal. :) Allow the bacon to strain a bit on some paper towels or napkins before taking them to the chopping board.
 
Over to our biscuits and cutting board...I chop some fresh cilantro. It gives a nice freshness to the fritters and also looks great. A little green goes a long way. (for those who are not fans of cilantro, you can use fresh Italian parsley instead)
 
 
Then I take some corn meal to my prep/cutting mat. It gives the biscuits a nice crunch adding a little more texture to the fritters.
 
Mix the cilantro and corn meal together. The colors just compliment each other so well.
 
 
Time to let the buscuits take a roll in the cornmeal & cilantro. I start off rolling each individual one so that they are well coated.
 
 
Then I add the cheese to the mix. According to my hubby, the more cheese the better. According to my doctor, everything in moderation. So I add just enough to make him happy without killing our hearts. Rolling the biscuits through the cheese, I try to make sure that each one gets plenty worked into the dough.
 
 
Grab my chopping knife and start giving the bacon a rough chop. The pieces could be as large or small as I like, but I prefer to have an array of sizes.
 
 
Gather the dough balls together and start rolling them through the bacon. Or they can be taken individually and worked through the bacon bits. Now to be honest, I actually do this both ways.
 
 
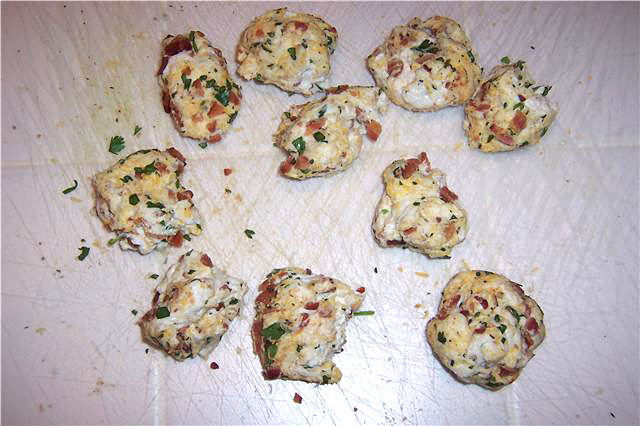
Make 10 balls of dough and set them apart. I just love the way all of the color jumps out at you. Don't they look pretty?
 
 
Next run a knife through each dough ball so that there are 20 balls to fry. (20 just sounds better than 10, plus they get done all the way through in no time) Then give them a quick roll in the leftover bits on the cutting board. Over high heat, I add enough oil into a medium sauce pan to be between 3 inches deep. Usually my choice of oil would be peanut oil, it has a high threshold to smoking, but you could really use either corn, vegetable or canola instead. Olive oil really doesn't give the best flavor, it's just too strong.
 
 
If you don't have this trick down yet, there is a simple way to see if your oil is hot enough to start frying. When you see the oil start rippling simply take a wooden spoon and dip the handle into the oil. If little bubbles start forming around the handle, then it's time to start frying!
 
 
Bring the heat down to medium high and gently drop in the first little dough ball to fry.
 
 
Then continue adding several more dough balls. Not too many, the temperature of the oil will begin to drop if there are too many in the pot. With a wooden spoon, give them a quick stir so that they don't stick to the bottom of the pot.
 
 
After approximately 3 minutes, I stir the fritters again, making sure that all sides are getting fried and golden brown. They should be done after a total of 5-6 minutes. Then with a slotted spoon, I remove one and cut it in half just to make sure. Remove the rest of the fritters with a slotted spoon and place on plate or cooling rack lined with a paper towel. 
 
Immediately top the fritters with a sprinkling of shredded colby jack cheese. (yeah, I've got a thing for colby jack cheese) Repeat the process with the remaining dough balls.
 
Plate them up, serve & enjoy!