Showing posts with label Sweet Tooth. Show all posts

Wednesday, January 28, 2015

Super Bowl Grub ~ SEAHAWKS BABY!!


My husband is a HUGE Seahawks fan...has been since he was in the 8th grade.  So, needless to say that he can't wait for Super Bowl Sunday this year.  We'll all be decked out in blue and green, yelling at the TV like people who have completely lost their minds.  Fun :)


In the midst of the chaos that is sure to ensue, we will be munching on some seriously yummy eats.  Here's a round-up of some great recipes from around the blogsphere for you to enjoy while you watch the game...or retreat to another area of the house.  I'll be following the ball and then retreating during the half time show...Katy Perry? 

Sunday, November 23, 2014

'Tis The Season For Pies, Pies, Pies!

Pockets Of Love Cherry Pies - TheChattyMom

This week we walk smack-dab into the season of pies.  This is when there are pies aplenty adorning everyone's tables and hanging out in just about every fridge on the block. 

Now, I am not a master pie maker, there is still much for me to learn in the area of making pie crust. That being said, it doesn't keep me from trying my hand at a pie now and then.  That's how you get better at doing something, right?  You try over and over until you feel that you've got it mastered...or at least down to a reasonable outcome.
 
Well, in the interest of others who like to bake pies now and then, I have pulled together some wonderful pies from others who have more experience at baking them than I.

Saturday, March 9, 2013

BLIZZARD Month BOGO Event ~ March 1-21


Who doesn't love ice cream? And what ice cream lover doesn't love Blizzards?! 

Well, March has been declared BLIZZARD MONTH! From March 1-21 participating Dairy Queen locations are offering an enticing BOGO event: Buy One Blizzard, Get One For Only $0.99!


Love this blog? Please click the Top Mommy Blogs banner every day! This casts a vote for my blog today and helps me continue to get great products to share with you! You can vote daily! Thank you so much!

Top Mommy Blogs - Mom Blog Directory

Sunday, March 3, 2013

The Keys' Key Lime Scones


I am a ridiculously huge lover of scones...so far there hasn't been a scone to cross my path that I haven't at least liked, if not loved.

But sometimes I like to have a little *zing*...so I decided to have some fun with key limes. So, if you like limes, key lime pie or just some *zing*, then I think you're going to love these little goodies too.

Friday, March 1, 2013

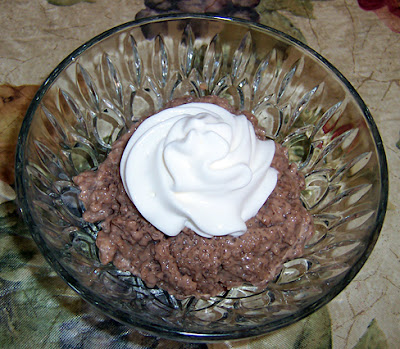
Bailey's Irish Cream & Chocolate Tapioca Pudding


In the spirit of St. Patrick's Day I decided to try a little something different. 
 
Since I was a little girl I have loved tapioca pudding...there's just something about that texture you get from the tapioca pearls. (and they're like chewing on little gummy bears too) Couple that with my introduction to the flavor of Irish Cream when Jelly Belly had their Irish Cream flavor jelly beans. As for chocolate, well let's just say that I'm pretty sure that there is a percentage of chocolate flowing through my veins on a regular basis.

Tuesday, February 12, 2013

Personalized Valentine Fortune Cookies

What am I up to today?  Well, I'm teaching my girls to make fortune cookies of course!

 
Not those weird ones in the "Fortune Cookie Maker" that my daughter wanted so bad at Christmas.  These fortune cookies are YUMMY!!!

 
If you have never made these before, you've got to give it a try.  Really, they are ridiculously easy to do and so much fun to pass out to family & friends.
 
Here's the recipe I found in 2008 in WOMAN'S WORLD and am still in love with today.  They are addictively tasty and so much fun to decorate. 


My girls LOVE making these when Valentine's Day & Easter come along. (yes, we decorate in spring time flair too)
 
Valentine Fortune Cookies
Kitchen Time: 30 minutes
Total Time: 45 minutes
Yield: 8 cookies (large cookies)
Calories: 170
 
Ingredients:
2/3 c Flour, all-purpose
1/2 c. Sugar
1 Tbsp. Cornstarch
3 Egg Whites
6 Tbsp. Butter, melted and cooled
1/2 tsp. Almond Extract

Instructions:
For each fortune, with a food-safe marker, write sentiment on strip of paper.

Preheat oven to 350°F.
 
Generously coat baking sheet with cooking spray.
 
In a medium bowl, whisk together flour, sugar, cornstarch, egg whites, butter and almond extract. 
 
Making two cookies at a time, drop batter onto baking sheet, about 7 " apart.  Using a small spatula or back of teaspoon, spread batter in a circular motion, into 5" rounds.  Bake 9-10 minutes until edges are just lightly browned.
 
Cover palm of hand folded kitchen towel. With large spatula, flip hot cookie over onto towel.  Working quickly, place fortune in center of cookie and fold cookie in half.  If cookies cool and become too firm to shape, pop them back into the oven for a minute or two just until they soften.
 
Immediately bend in corners to form fortune cookie shape.  Place into cup of muffin pan to cool.  Repeat with remaining cookies while warm.  Decorate as desired.
 
Dip:
Melt 3/4 cup chocolate chips or candy melts; stir in 2 tsp. canola oil until smooth.  Dip one side or end of cookie into chocolate; place on wax paper.
 
If desired, immediately decorate with sprinkles, candy decorations and/or drizzled chocolate.

Thursday, February 7, 2013

Cream Cheese Buttercream Frosting

 These cupcakes are topped with my Cream Cheese Buttercream Frosting. I am not a fan of frostings that are grainy & made with shortening. So I always go for something that is soft, creamy and preferably fresh.
 
If you have 5 minutes, then you have enough time to make this delicious shortening-free frosting. All you need is 3 ingredients! Yes, you read this correctly...only 3 ingredients.
 
 
Take 8 ounces of cream cheese and slice it so that your mixer has a little bit less work to do.
 

Add to that 1 bar of room temperature butter.
 

Turn on the mixer and whip it until the cream cheese and butter are nice and fluffy.
 

Add 1/2 cup of confectioner's (powdered) sugar. Do this a little at a time or else you're going to have sugar flying everywhere...and I do mean everywhere.
 

Let the blender do it's thing and when everything is beautifully blended you are ready to frost whatever is waiting on the counter next to you.
 

In this case, I frosted some Princess Cupcakes for my daughter's school birthday party. 


Tip: When frosting cupcakes, use a sandwich baggie to apply the frosting. Just snip the corner of the baggie and you have an instant pastry bag.   

Cream Cheese Buttercream Frosting

Prep Time: 5 minutes 
Servings: Enough for 12 cupcakes 

Ingredients: 
8 oz. Cream Cheese 
1 stick Butter, room temperature 
1/2 cup Confectioner's Sugar (powdered)     

Instructions: 
In a large mixing bowl add cream cheese & butter. Whip on medium speed until light and fluffy. 

Reduce speed to low, add confectioner's sugar, a little at time. Whip until well incorporated. 

Ready for frosting!  Tip: When frosting cupcakes, use a sandwich baggie to apply the frosting. Just snip the corner of the baggie and you have an instant pastry bag.   

Refrigerate if not being used immediately. Allow to come to room temperature again before using.

Pockets of Love ~ Cherry "Valentine Love" Pies

I love baking up little surprises for my family.  It's very rare, like once in a blue moon rare, that I make any pies...my skills seem to be best suited for baking cookies, brownies & cakes. 

However, I have heart shaped cookie cutters...

and I have pie crust on hand...
 
therefore I must make a little pocket of love to share with those I love most!

Here is one of the simplest recipes that you can have to make little hand pies of love for your family. And it's a great way to get your little kiddle into the kitchen for some baking one-on-one time.


Gather a few items to get the ball rolling. See recipe for additional optional ingredients.


Start by cutting pairs of shapes with a cookie cutter.


If you are like me and like a little decoration on top, cut out a few small hearts as well.


Then place some of the cutouts on a prepared baking sheet. (lined with parchment paper or a silpat)


Spoon filling onto the center of a dough cutout.  I kind of over did this one...go a little lighter on the filling than I did here or it will be difficult to seal the edges.


Place another dough cutout on top.

Press with a fork around the edges to seal.  As you can see, some of the filling oozed out on me...as long as you seal it, your pie will be fine. (this comes from me not baking pies more than once in a blue moon)

Brush the top of the pie with egg white.


Since I don't like to be plain...Place decoration on top & brush with egg white as well.  Then sprinkle raw sugar on top to finish it off.


Into the oven it goes for 12-15 minutes.  Out it comes beautifully golden brown (and this one oozing with filling).  The smell, oh the smell!


After about 2 minutes, onto a wire cooling rack for another 10 minutes. And if you're making these for adults and kiddles, then isn't this perfect?! Larger pies for the adults and smaller ones for the kiddles.  Confession must be made, I couldn't wait more than 5 minutes to take a bite.


Perfection comes with a scoop of vanilla bean ice cream! 
 

Cherry Valentine Love Pies

Prep Time: 15 Minutes
Bake Time: 12-15 Minutes
Level: Easy
Yield: 4 Large & 4 Medium Pies

Ingredients
1 pkg. Pillsbury Pie Crusts (2 rounds)
1 can Cherry Pie Filling
1 Egg White
Raw Sugar

Optional Ingredients:
1Tbsp. Sugar
1 tsp. Light Brown Sugar
1/4 tsp. Cinnamon
1/8 tsp. Nutmeg
A Pinch of Cloves, ground

Instructions
Preheat oven to 375°F. Line baking sheets with parchment paper or silpat.

Unroll one pie crust onto parchment paper or cutting board. Using large & medium heart shaped cookie cutters, cut out 2 heart shapes for each pie. (top & bottom) Repeat for second pie crust.
Optional: Using a small cookie cutter, cut out individual hearts from scrap dough for decoration

Place dough cutouts onto the baking sheet. Take pie filling and spoon 2-3 teaspoons of filling onto the center of one heart. Place another (same size) cutout on top. With a fork, press around the edges to seal.

With a pastry brush, brush egg white over the top of each pie. If adding a small heart on top for decoration, place and brush with egg white as well.

Sprinkle raw sugar over the top of each pie.

Bake for 12-15 minutes, until crust is golden brown. Keep an eye on them to avoid burning.  Baking times vary by oven.

Allow to cool on baking sheet for 2 minutes. Transfer to wire cooling rack for additional 10 minutes.
Serve warm or seal in airtight container and store in refrigerator of up to 3 days.

Need heart shaped cookie cutters?


Wednesday, February 6, 2013

Snickerdoodles ~ Charming's Favorite Cookie

Snickerdoodles are by far my husband's favorite cookies.  He loves others, but these are the ones that he's always asking me to bake.  And now our youngest, Rose, is a snickerdoodle addict. 
 
The day that I baked these she repeatedly attempted to convince me that these could be eaten for breakfast, snack, lunch, 2nd snack and dinner. 
 
Needless to say that despite her extraordinary reasoning skills, she just couldn't convince Mommy that there was enough nutrition in them to cut-it.  But I'll give her an "A" for effort. 
 
We both enjoyed baking these together so much that I've agreed to make it a monthly thing...unless it starts reflecting negatively on the scale.
 
These are really a great cookie to bake with little kiddles.  They get to help roll the dough and coat it without too much worry of accidental messes.  And, if you choose to, they get to lightly smoosh it...that was her favorite part. It was perfect for me and my little baker to make a memory.


Snickerdoodles
Prep Time: 15 Minutes
Bake Time: 12-15 Minutes
Level: Easy
 
Ingredients
2 3/4 c Flour, all-purpose
2 tsp. Baking Powder
1/2 tsp. Salt (use 1/4 tsp. if using salted butter)
1 c (2 sticks) Butter, softened
1 1/2 c Sugar
2 Eggs, extra large
 
Coating
3 Tbsp. Sugar
2 tsp. Cinnamon, ground
 
Instructions
Preheat oven to 325°F.
 
In a medium bowl add flour, baking powder and salt. Gently whisk to combine ingredients, then set aside.
 
In a large mixing bowl add butter and sugar.  Mix at medium speed until butter becomes pale in color and is fluffy. (about 3 minutes)
 
Mix in eggs.
 
Gradually add flour mixture, mixing at low speed.
 
In a small bowl combine coating ingredients: sugar & cinnamon.
 
Shape dough into approx. 1-inch balls and roll in the cinnamon sugar. Be sure to coat the entire ball.
 
In a lined baking sheet (parchment paper or silpat) arrange balls 3-inches apart.  

Optional: Lightly press each ball with the palm of your hand to slightly flatten them, keeping the thickness consistent.  About 1/2-inch thick. This allows an even baking time.

Bake cookies for 12 - 15 minutes until the edges are golden brown. Rotate the baking sheet half way through the baking process.


Remove and let cool on wire racks.

Tuesday, February 5, 2013

Exceptional Chocolate Chip Cookies


My mother had a tradition of baking chocolate chip cookies whenever it rained. So many days I would run home from the bus stop because I knew that there would be warm cookies there welcoming me home. 
Those were sweet memories...and now I am making it a point to create similar memories with my girls on rainy days.  My husband welcomes rainy days and insists that it need not be raining to do a little baking.

Here is the recipe that we have used for over 30 years...and sometimes we are lucky enough to have our favorite mouse show up on the cookie sheet. If you're wanting to see this guy when you pull your cookie sheet out of the oven, just allow a little bit of over crowding to take place. (works every time)
Of course you have to have a glass of milk there to keep a cookie company, right? Doesn't this cookie just look ridiculously tempting?  It beckons your sweet tooth, "Come, just a little nibble."  And then you're hooked!
I hope that you and your family enjoy them as much as my family has all these years.

Exceptional Chocolate Chip Cookies
Prep Time: 15 minutes
Bake Time: 10-13 minutes
Yield: Approx. 2 dozen cookies

Ingredients
2 1/4 cups Flour, all-purpose 
1/2 tsp. Baking Soda
1 cup (2 sticks) butter or margarine, softened
1/2 cup Granulated Sugar
1 cup Light-Brown Sugar, packed
1 tsp. Salt (cut in half if salted butter is used)
1 1/2 tsp. Vanilla Extract (2 tsp. if opting out of the almond extract)
1/2 tsp. Almond Extract (optional)
2 Eggs, extra large
1 1/2 cups (12 ounces) semi sweet chocolate chips or 60% cacao chips
Tip: Add 1 Tbsp. honey for a chewier cookie & add 2 Tbsp. Flour

Instructions
Preheat oven to 325°F.

In a medium bowl, whisk together flour and baking soda. Set aside.  High Altitude: Add 2 Tbsp. additional flour

In a large bowl, add butter and sugars.  Mix together until light and fluffy, about 2 minutes. 

Reduce speed to low. Add salt, vanilla, almond extract and eggs. (if choosing to do so, add honey at this point)  Mix until well combined.

Mix in  flour mixture.  Once incorporated, stir in chocolate chips.

Drop tablespoons of dough onto baking sheets lined with parchment paper or silpat/non-stick baking sheets. Space dough two-inches apart.

Bake for 12-15 minutes.  Let cool on the baking sheets for 2 minutes. Move cookies onto wire cooling racks.  Allow cookies to cool completely. Or enjoy warm.

Wednesday, January 2, 2013

What's For Breakfast? Eggnog French Toast!


Oh how I love the holidays...and eggnog....and French toast.... So I thought to myself, "Why not combine eggnog & French toast?"

Why not indeed! So, I set out to fulfill my tummy's desire for the combination that has since made me happy from taste buds to tummy. And here is the recipe of the wonderfulness of Eggnog French Toast:


It's hard to get down to fewer ingredients than this! One egg, your favorite eggnog and a couple of pieces of bread-I like wheat, but use what you will. (Oh yeah, if you're like me add a little bit of cinnamon and nutmeg just to spice it up a bit) And if you decide to make this for more than yourself, just double, triple or quadruple the recipe.


Grab a medium bowl. I prefer to use an empty pie tin. Add your egg and beat until light and fluffy.


Add 1/4 cup of your favorite eggnog. Again, beat until well mixed.


 Alright, this next step is optional...add cinnamon or nutmeg and beat until well blended into the batter.


Here's our set-up for production...a baking dish (or plate) to place battered bread, bowl of batter and our starting point of bread.


 Take a slice of bread, my choice is wheat, and place it into the batter. Allow the bread to soak in the batter for approximately 1 minute, then turn over the bread slice and allow the other side to soak for an additional 30 seconds.


This is the goodness of cinnamon and nutmeg...oh, how I love French toast! Once the first slice is well coated, remove it and place off to the side on a baking dish or plate. Repeat steps with the 2nd bread slice.


Preheat a skillet over medium heat. Add a pat of butter (1 teaspoon) and allow it to melt completely.


Add the first slice of our battered bread.

 
Almost immediately the wondrous aroma of the eggnog, cinnamon and nutmeg start to waft up from the skillet.


 Would you just look at that beautiful, bubbly butter doing it's magic!

 
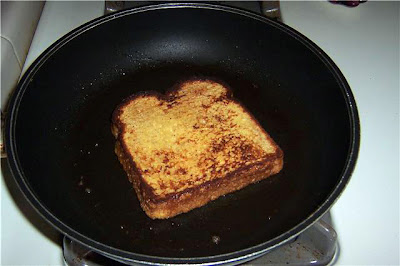
After giving the toast about 5 minutes on the first side, go ahead and flip it over. This is the picture you should see when you do...golden and toasty good.


Give the newly flipped side about 5 minutes to cook through. The last thing you want is soggy French toast. And when the time is up, this is the picture you should see when you flip the toast to check the doneness. Time to do the whole cooking process again with the second slice of battered bread.


In the meantime, go ahead and butter & syrup your delectable slice of eggnog French toast. (you could add a sprinkling of powdered sugar, but I really think it takes away from the eggnog)


 Enjoy, enjoy & enjoy!